Grab A Kid and Quilt!
Little Fish ( my six-year old grandson ) and I found the perfect "rainy day" project. He found some white fabric blocks left over from his Speech Therapy quilt that we made and wanted to know if he could draw on them. I brought out a package of the Crayola Fabric Crayons ( available at Amazon and at JoAnn Fabrics and well worth having ) and let him go..... He was in the mood for cute little aliens and bugs. He drew block by block. A few on Friday evening and a bunch on Saturday until all 12 blocks were done.
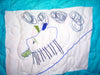
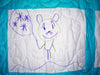
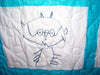
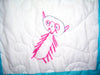
When Little Fish was finished drawing, we went to my studio and ironed the blocks. He helped iron and had to re-examine each block after it was pressed.
When you use the Crayola Fabric Crayons, you can draw/color on paper, making a transfer that can be ironed onto a piece of fabric. I prefer ( after 11 years of working with them ) to let the children draw directly on the fabric. I think the colors come out crisper. It is also easier for the children as it is difficult for many young children to understand why something is backwards when it is transferred! I do, however, recommend placing the fabric block on top of a piece of oatmeal paper while drawing or coloring. The oatmeal paper is a rough, or textured, paper that helps keep the fabric from slipping or bunching while being drawn on.
If you make a transfer, put the colored side down on your fabric block and press with a hot iron to complete the transfer. If you draw directly on the fabric block, cover the artwork with a piece of plain paper and press with a hot iron to set the colors. You will notice the colors brighten when set.
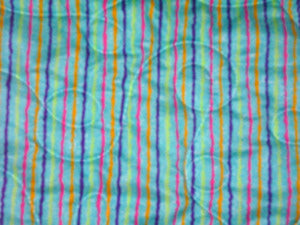
After Sunday breakfast, we went back to the studio and my grandson chose the fabric he wanted to use for around the pictures ( AKA sashings ), borders and backing from my stash. We started to cut and sew. We surrounded the 10X12 inch picture blocks with a 2½ inch, blue sashing. Next we added a 3 inch yellow border and a 2 inch border from the same blue as the sashing. Soon we had created the quilt top! We made the back from a coordinating blue with yellow, purple, green and pink stripes.
Today was another rainy day. We headed back to the studio this afternoon and put the quilt on my long arm machine and quilted with a Wandering Loop design. You may quilt your quilt any way you desire or even tie at the corners. You could also decide to bring your quilt to a long arm quilter to be finished for you.
Finally, we brought the back around to the front for a wrap around binding. OneMoreQuilt is made!!!
I was so pleased when my grandson showed the finished quilt to his mom and said, "It's so soft and comfy. I made it with my grandma."
It's a good thing our airconditioning is on because there was no chance of separating him from this new quilt tonight. He went to bed curled up in his new quilt. Happy. I will go to bed tonight knowing we made a new quilt and a new memory. Happy.
I hope you will grab a kid and make this project. Find your child, grandchild, niece, nephew, friend or neighbor and make a quilt. Make a memory.
Happy Quilting!
Laurel