Dry Erase Erasers
Dry erase boards are very popular now days. I have them at school.....large for use with the whole class at once and small for individual use alone or in small groups.
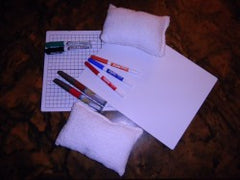
The tools pictured to the left are the plain and gridded whiteboards that I use to help me design quilts and quilting. I have markers in several widths from fine line to wide and every color imaginable. The board with the grid lines helps when I'm trying to draw a new quilt pattern or trying new color combinations on an old pattern. The plain whiteboard is great for sketching quilting designs and figuring out stitching patterns for a particular quilt top.
I have always had a problem with the dry erase erasers though. They're great when they are brand new but after they're used for a while, they get a little gunky and I have difficulty getting them clean.
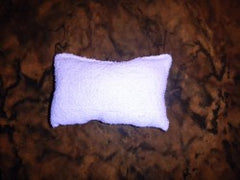
I came up with a helpful little solution to my problem!!! I made my own erasers!!! They are inexpensive to make, easy to grip and best of all, they are washable.
My erasers are made from terrycloth and filled with scraps of polyester batting. I made them like little pillows so you have something to hold on to while erasing.
I gave our reading resource room teacher a sample eraser and she liked it too. Classes divide into five groups in her room. Small group work is done and often the individual dry erase boards are used. I came home from school today and made 30 erasers for her classroom. I can't wait to give them to her next week!!! I think she will be very excited to have a whole classroom set of erasers for her dry erase boards and the students (first, second and third graders) will be happy to each have their own eraser to use!!!
If you would like to make your own erasers, this is what I did. I cut terrycloth into 8" x 10" pieces. Fold in half so it is now 5" x 8". Stitch around the three open edges leaving an opening to turn and stuff. Trim the corners, turn right side out and stuff with polyester batting scraps. Top stitch along the edge with the opening to close it up. Feel free to make improvements on this pattern.
This project works up quickly. I made 30 of them in just under 5 hours.
Happy Quilting,
Laurel