Baby Quilts
We have a new grandchild on the way! Our son and his wife are expecting a baby girl and we are all very excited. Our grandson is ten years old so it has been awhile since we have had a baby around here!
These two quilts are the first two to help give her a warm and cozy welcome into the world.
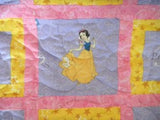
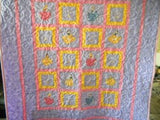
I saw this Disney Princess fabric and couldn't resist it. It went into my shopping cart so fast... there was a blur!
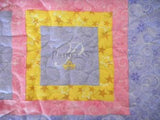
Each of these fabrics is sparkly. I fussy cut (carefully cutting so the image is centered) each of the princess blocks 6½" for a finished 6" block. I also fussy cut each of the princess crown blocks. They were cut 4½" for a 4" finished piece. I found this beautiful yellow with gold stars to match the color of the crowns and some of the princesses gowns. I cut 1½" strips for a 1" frame around each of the crown squares (they are now each 6½" squares like the princess squares). I laid out the squares in a 4x5 grid alternating the princess squares with the crown squares. Next, I cut 1½" strips of the pink fabric with swirls and used them for sashing (1" finished). I added a 4½" (4" finished) border made from the purple fabric with swirls and small flowers. Then a 1½" (1" finished) pink swirly border and finally a 6½" (6" finished) purple swirly outer border.

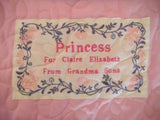
I used a solid pink sparkle fabric for the backing and added a label before quilting an all over design of wandering loops.
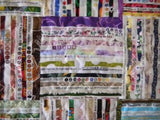
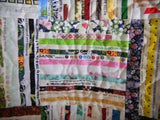
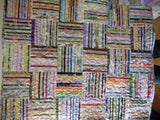
The second quilt is made entirely of selvages (the edge of the fabric which identifies the fabric using information such as the designer, manufacturer, year and colors used). My daughter-in-law loves a lot of color and this is a colorful quilt.
I cut the selvages so at least ½" of the fabric shows. I think this adds character to the quilt and makes it more attractive than just using the white strip of information.
I sewed the selvage strips together (lay one strip on the other exposing approximately ½" of the fabric's design/color-sew very close to the edge to secure the two pieces-repeat to desired size) then squared up (cut so each block is a particular size with straight edges) each block to measure 6½" for a finished 6" block.
I sewed the blocks together into a 5x6 grid alternating the pieces in a horizontal/vertical placement.

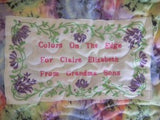
I found an awesome tie dyed fabric for the backing. This beautiful fabric contains shades of green, blue, yellow, orange, purple, red and pinks with a little splash of black. I named this quilt "Colors On The Edge" and attached my label before meandering the entire quilt.
I like to quilt baby quilts with a fairly close over all pattern because it helps strengthen the quilt for its many washings and frequent use.
My hope for these quilts is that they will be comforting, loved a lot, hugged tight, dragged around, napped on, traveled with, cuddled under, snuggled with during bedtime stories and maybe... just maybe... be "the blankie"!
Happy Quilting,
Laurel